A construction project creates thousands of photos, and most of them only matter months later: during a handover, a defect claim or a payment dispute. By then, a photo is only useful if you can say exactly where it was taken, which way the camera faced and when. This guide shows how to use ProofCam's construction tools so your site photos stay easy to find and harder to question.
Every photo already carries a time and location stamp and a Photo Code. The tools below add where on the drawing, which direction and what changed.
Floor plans: put each photo where it belongs
Floor plans are a Business feature (including the Business trial) on Android and iOS.
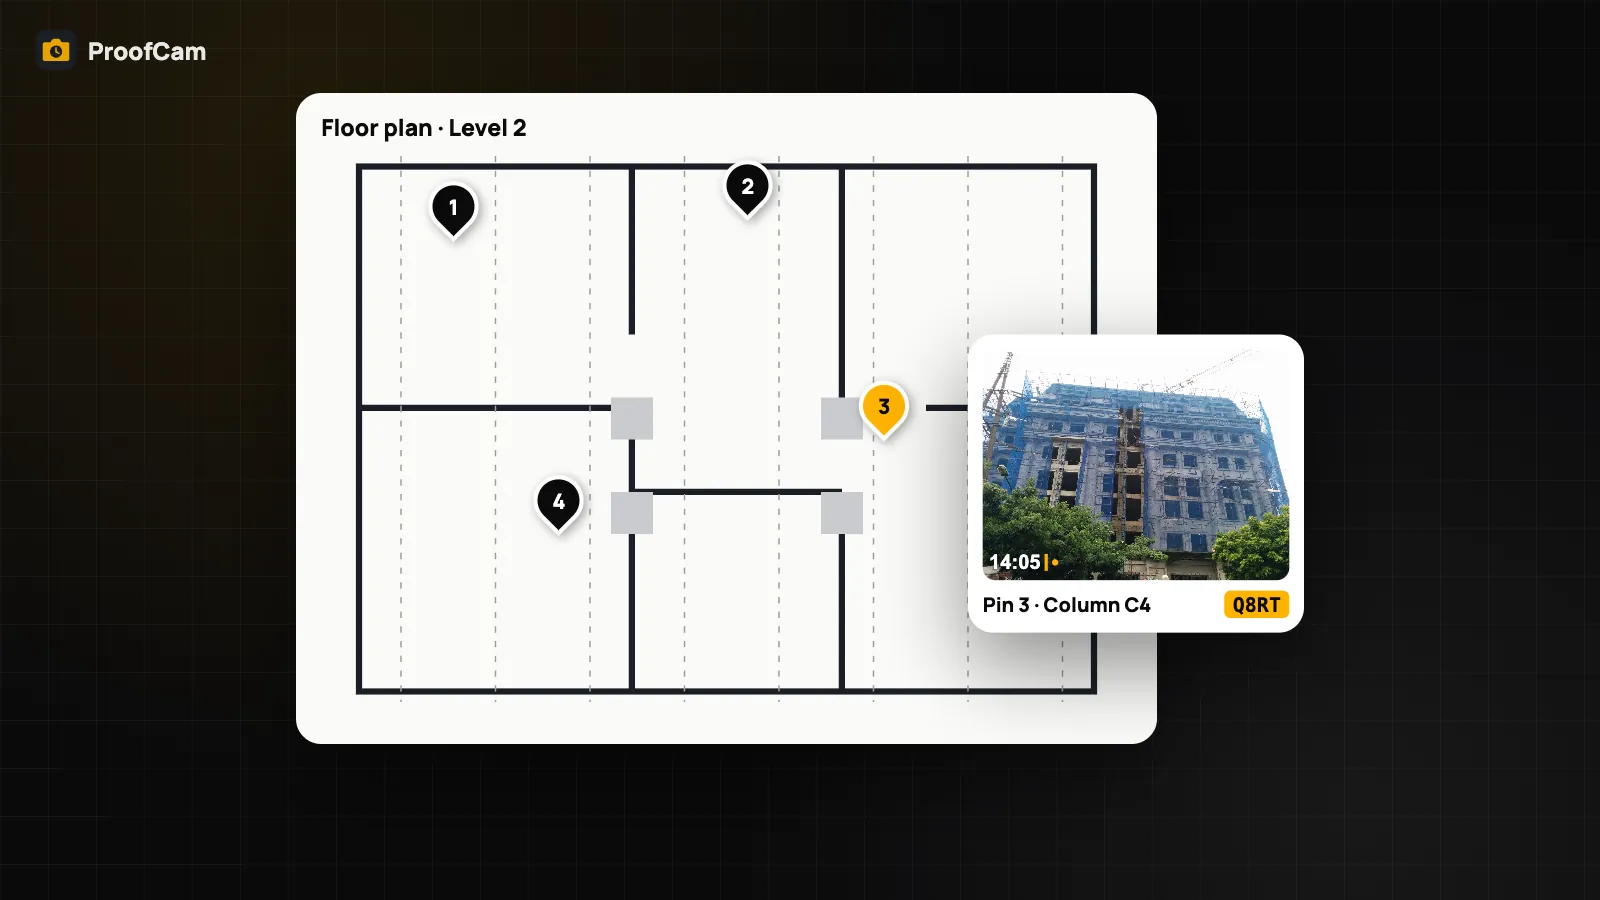
- Import a floor plan into a project as a PDF or image. On iPhones with LiDAR, you can also use a recent room scan.
- Zoom in and tap the spot you're documenting. Pin an existing photo, or choose "pin, then shoot" so the next photo you take is pinned there.
- Tap a pin later to open its photo, or remove the pin.
- Export a PDF of the plan with numbered pins and a caption page for each photo.
When a team photo uploads, its pin is sent with it. Pins added after a photo has uploaded stay on your device, and plan files stay on the device that imported them.
Level, true north and the 4-direction set
A crooked or unlabeled photo makes it hard to read a wall, a slope or a façade. ProofCam has a level on the camera preview (bubble, 0.1° steps, "Set zero") that is free for everyone. Printing pitch and roll on the photo is a Plus option. Compass headings use true north, which corrects for magnetic declination. If the compass isn't reliable, ProofCam leaves the heading off the photo instead of printing a wrong number.
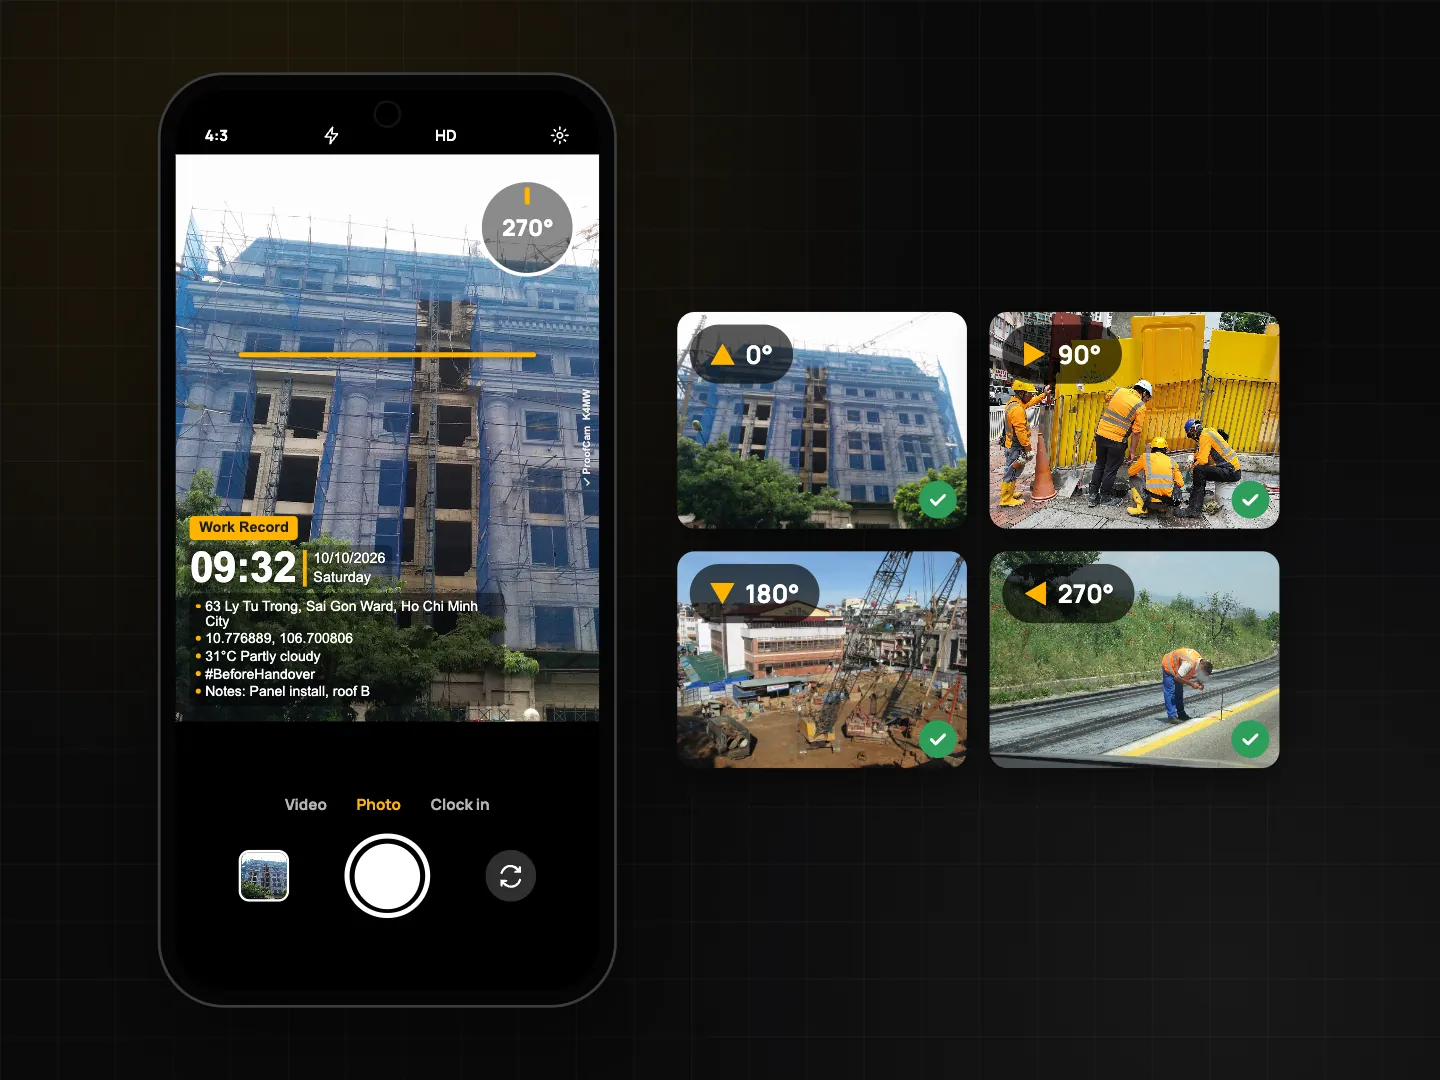
The 4-direction set (Plus) records a full view of a location:
- Tap the "4 directions" chip on the camera.
- ProofCam guides you to face North → East → South → West, with arrows showing which way to turn.
- The shutter only works when you're within 10° of the target direction. If the compass is unreliable, the set is locked until you recalibrate.
- Each photo gets a line like "Direction: N · 358°T" and keeps its own Photo Code, and the four photos are grouped as one set.
- After the fourth photo, ProofCam offers a 2×2 collage labeled N/E/S/W.
360° photos from an external camera
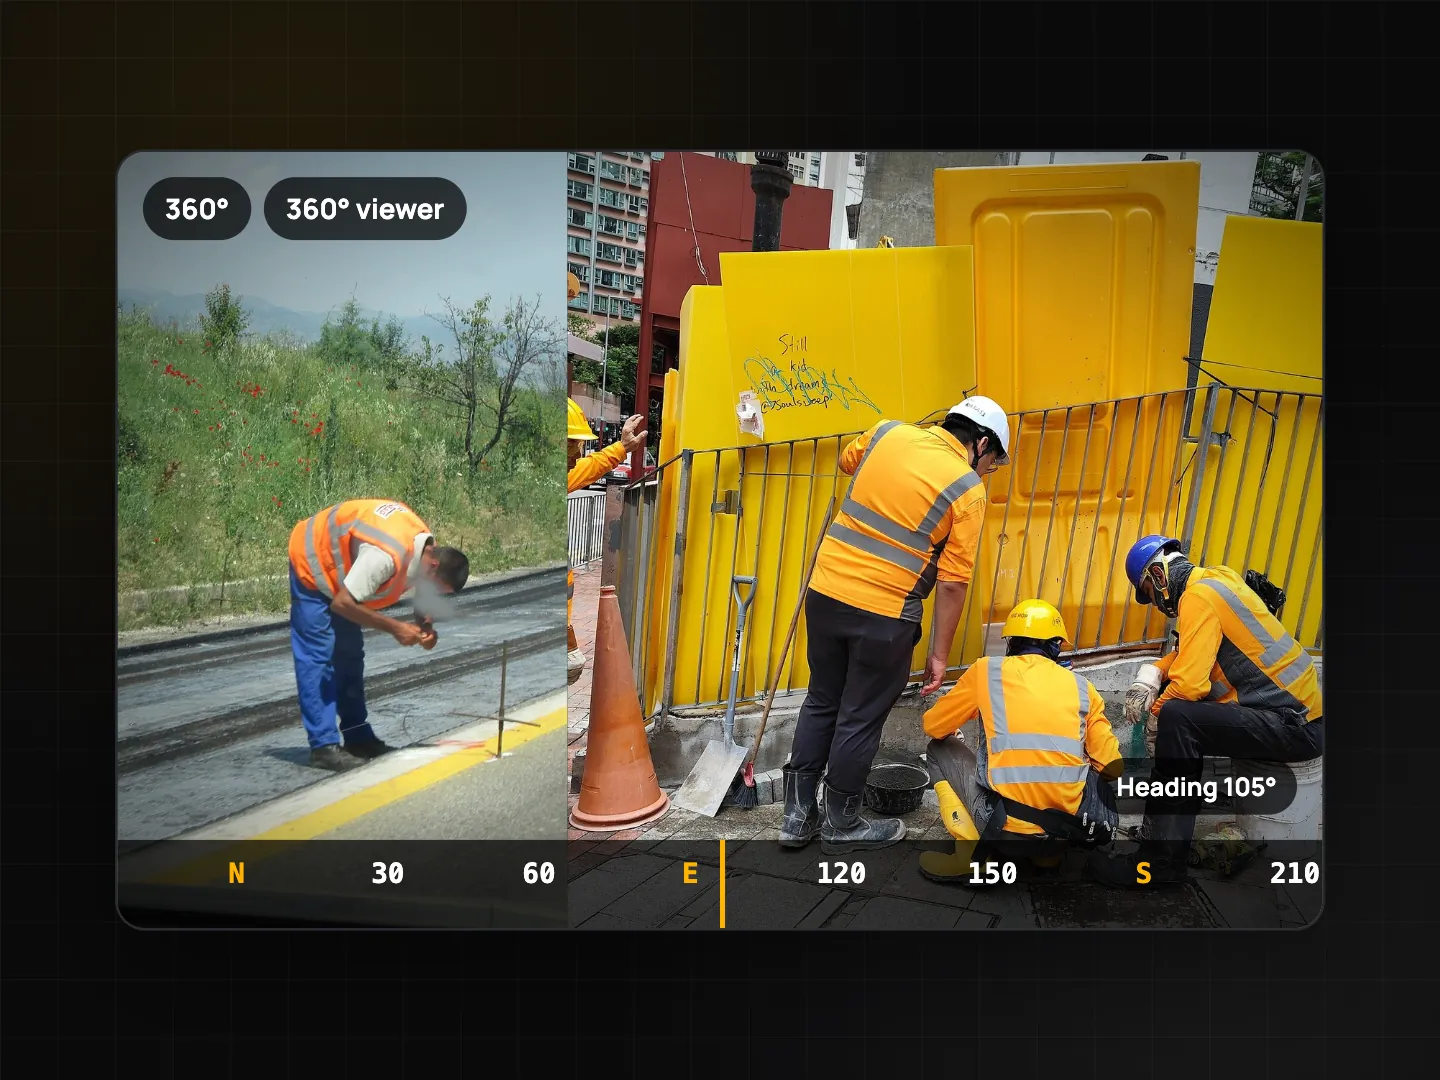
If you use a 360° camera, 360° import (Business) brings the panoramas into the project:
- Import the equirectangular photo from your phone's photos or files.
- Look around in the built-in viewer by dragging and pinching.
- The photo is labeled as imported from an external camera. Its Photo Code is issued at import, not at capture, and its location comes from the 360° camera's own data, not from where you imported it.
Before and after
Progress and repairs are easiest to prove side by side:
- Tasks (Teamspace): create a task from a defect photo. When it's fixed, "Take after photo" shows the before photo as a faint overlay so you can line up the same angle. ProofCam warns if the after photo was taken somewhere else. See punch lists with before/after photos.
- Comparison slider: in a photo's details, pick a second photo and drag the slider to compare them. On Android the slider also appears in task details. On iOS it's in photo details, and adding it to task details is in progress.
Daily reports, site diary and walkthrough notes
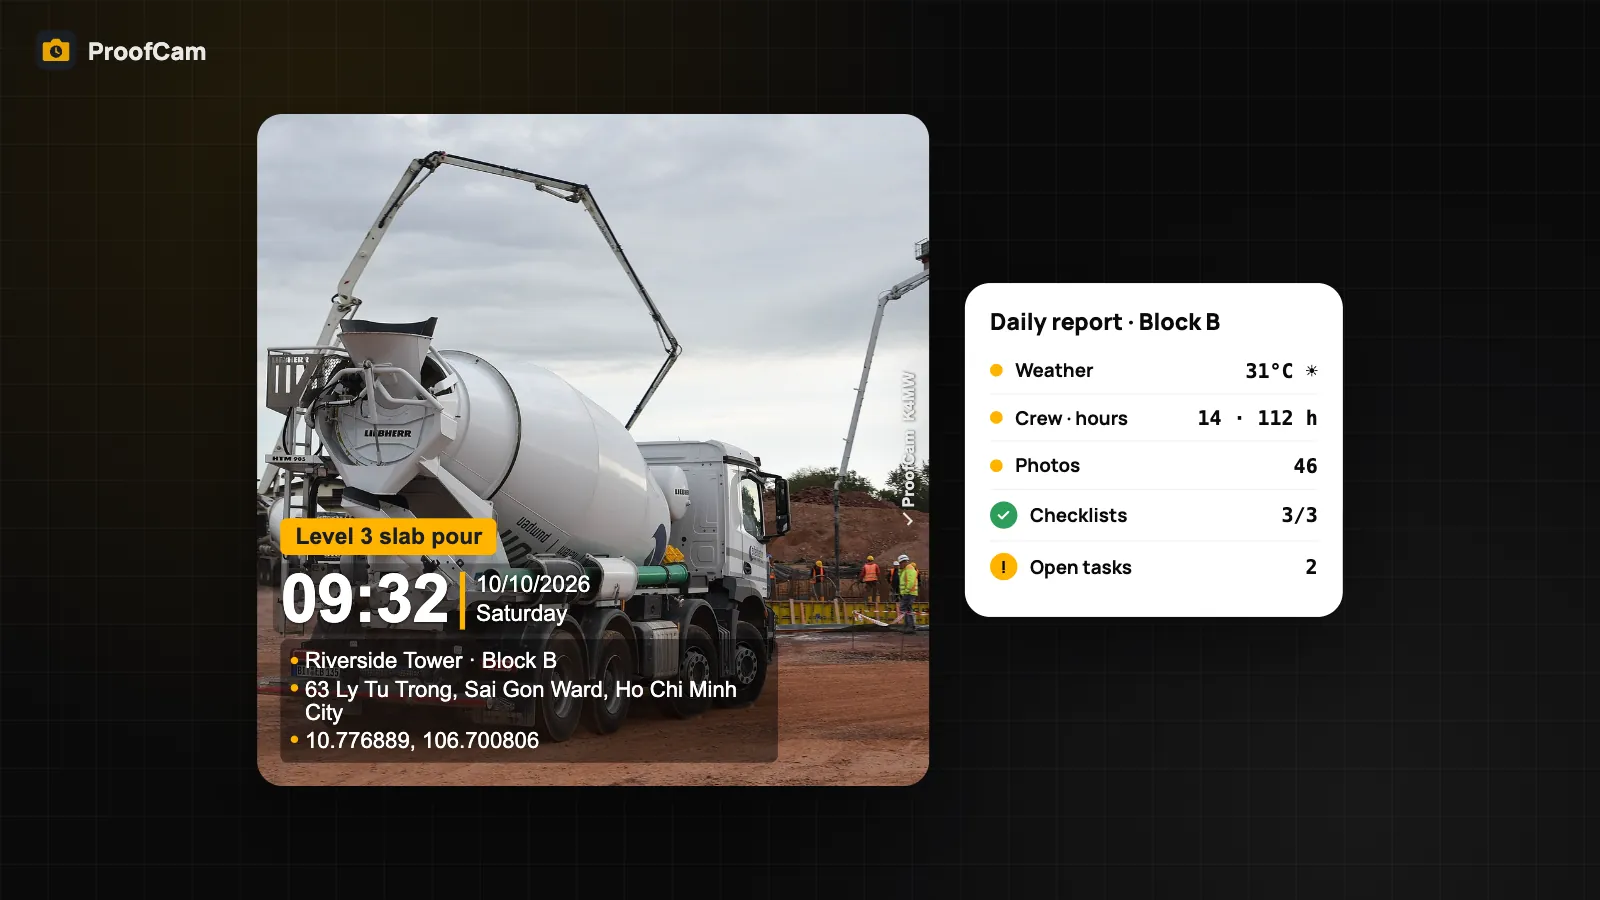
- Daily report (Teamspace, Business): for each project, it collects weather, crew and hours, photos, checklists, tasks and notes. A manager signs it and shares it.
- Site diary (Plus): a personal diary for people working alone. It fills in the weather, your hours from your own clock-ins, equipment, materials, issues and the day's photos, and creates a PDF on the phone.
- Walkthrough note (Plus): talk while you walk and take photos as usual. When you stop, ProofCam matches what you said to the photos by time, suggests a summary on the device, lets you edit it and creates a PDF. Speech recognition runs on the device and no audio is saved. If your phone doesn't have the speech language installed, you can type instead.
For structured inspections, combine these with inspection checklists and PDF reports.
Interval capture and time-lapse
Interval capture (Plus) takes a photo every N seconds or minutes from the same position. Use the "Timer" chip on the camera. The screen stays on while it runs, so mount the phone and keep it powered. Each photo is stamped and coded as usual. At the end of a session, or from photos you select in the gallery, ProofCam creates a time-lapse MP4 on the device.
Field tips
- Pin as you go, not at the end of the day. A pin placed from memory is less reliable.
- Shoot a 4-direction set at each room, grid line or façade before the work covers anything up.
- Calibrate the compass (figure-eight motion) away from steel and rebar when ProofCam asks.
- Use the same position for before and after. The overlay makes it easy.
Which plan
| Tool | Plan |
|---|---|
| Level on preview, true-north heading | Free |
| Tilt printed on photo, 4-direction set, interval/time-lapse, site diary, walkthrough note | Plus |
| Floor plans, 360° import, Teamspace daily report | Business (or trial) |
FAQ
Do I need a team to use floor plans?
Yes. Floor plans and 360° import need a Business team or the Business trial. Plus covers the personal tools like the 4-direction set and site diary.
Why is the 4-direction shutter disabled?
You're more than 10° off the target direction, or the compass is unreliable. Turn toward the arrow, or recalibrate away from metal.
Is a 360° photo verified the same way as a normal photo?
It has its own Photo Code, but the code is issued when you import it, and the photo is labeled as imported. The capture itself happened on the external camera.