A claim file lives or dies on its photos. The surveyor arrives at a flooded kitchen, takes forty pictures, and two weeks later the questions start: when exactly were these taken, is this the same house, was that crack there before the leak, how big is the stained area really? An insurance claim photo app should answer most of those questions on the photo itself. This guide shows how loss adjusters, surveyors and policyholders can use ProofCam to document damage with a trustworthy time, place and code on every picture, and hand over a file that is easy to check.
ProofCam helps provide evidence; it doesn't decide a claim. Whether particular photos are accepted is up to the insurer, so always check your insurer's or regulator's documentation requirements before you rely on any app.
Why damage photos cause friction in claims
- Time is easy to doubt. A phone clock can be changed, and photo dates in a gallery change when files are copied or forwarded. "Were these taken before or after the repair started?" is a common question.
- Place is easy to doubt. A close-up of a wet floor could be any floor. Without location and an overview shot, a close-up proves little.
- Old or borrowed pictures. A photo of a screen, or yesterday's photo re-shot today, gets today's date. Adjusters know this trick.
- Scale is missing. "Large water stain" means different things to different people. A number with a photo is much clearer.
- Paperwork scattered everywhere. Invoices, receipts and serial plates end up as random gallery photos and chat messages, and someone has to sort them into the file.
Which ProofCam features help
| Need | ProofCam feature | Plan |
|---|---|---|
| Time that doesn't depend on the phone clock | Network time on every photo; "device time" flag if not verified | Free |
| Place on every photo | GPS coordinates, address, accuracy; location trust grade and mock-location detection | Free (full grade on Android, basic check on iPhone) |
| Proof the file wasn't changed | Photo Code, verify page /#verify (fingerprint computed in the browser) |
Free |
| Ready-made claim form | Bundled Damage survey template + photo timeline PDF | Insurance pack: personal Plus, a team on trial, or Business with the insurance add-on |
| Size of the damage | AR measure: distance and height | Free on supported phones; path and area need Plus |
| Serial plates and model numbers | On-device text recognition, copy into the note | Free from photo details |
| Invoices and receipts | Document mode: multi-page scan to PDF, each page with its own Photo Code | Plus |
| Signs of a re-shot screen or print | Screen recapture warning; Live proof clip inside the photo | Warning on all plans; Live proof Plus or Business |
| Signed files | C2PA Content Credentials with a local device certificate | Plus or Business |
| Sending photos without the home's exact location | Share without exact location (Photo Code kept) | Free |
| Basements and rural sites with no signal | Offline capture and sync later | Free |
Building an insurance claim photo file that is easy to check
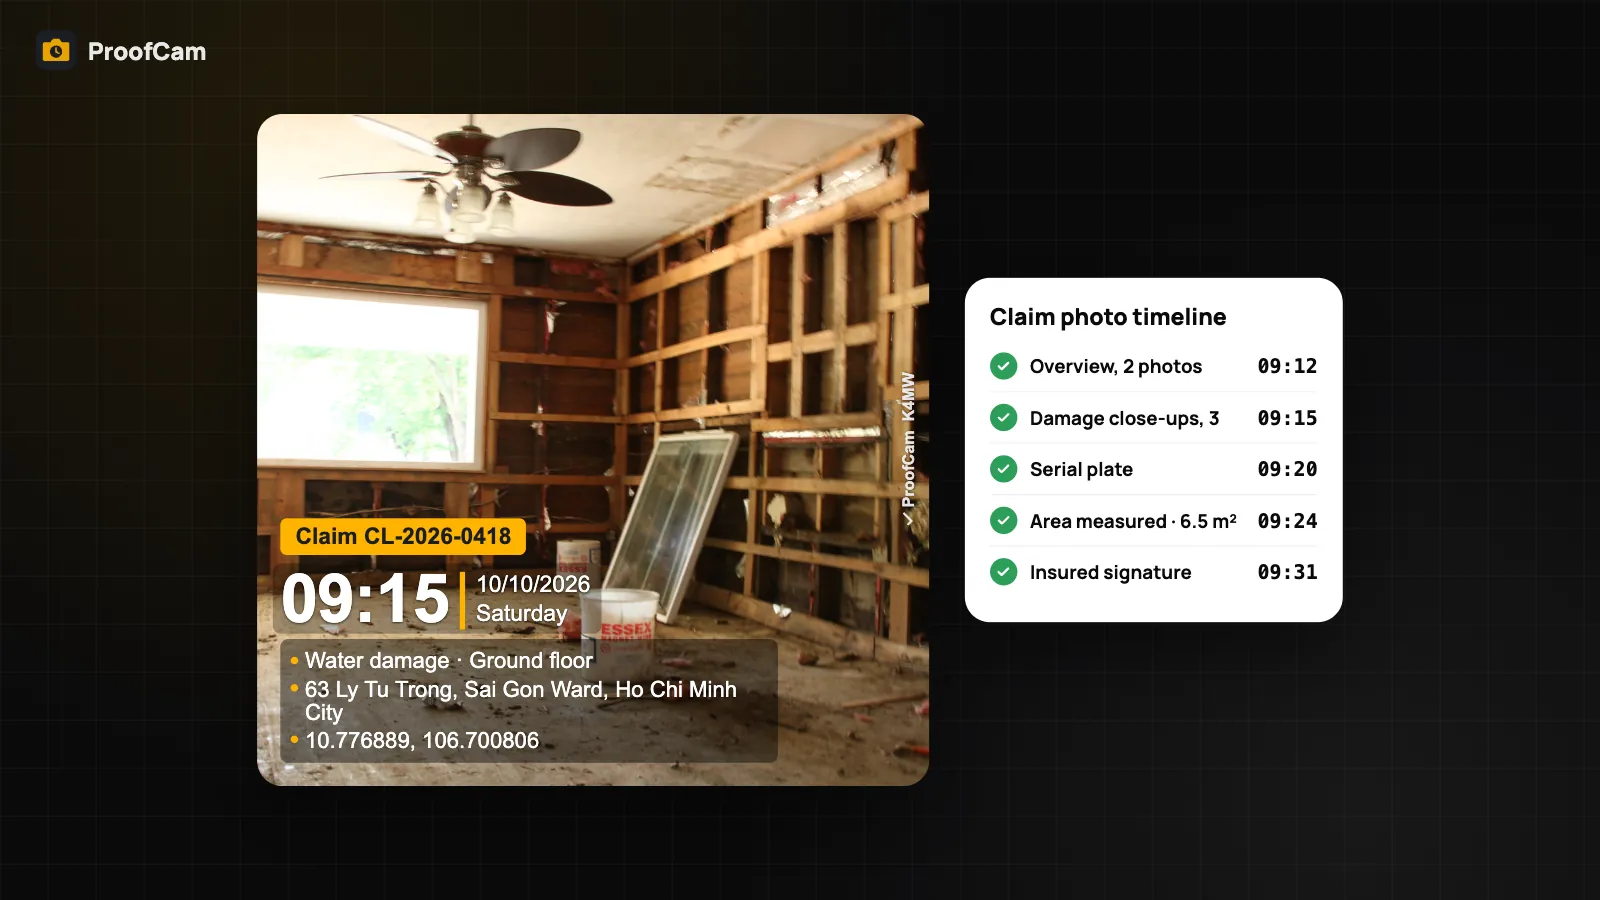
The single most useful habit is a fixed shot order: wide → medium → close-up. Start outside with the building and street number, then the room from the doorway, then the damaged area, then details. The overview shots give the close-ups their context, and because every photo carries network time and GPS, the sequence shows the visit as it happened.
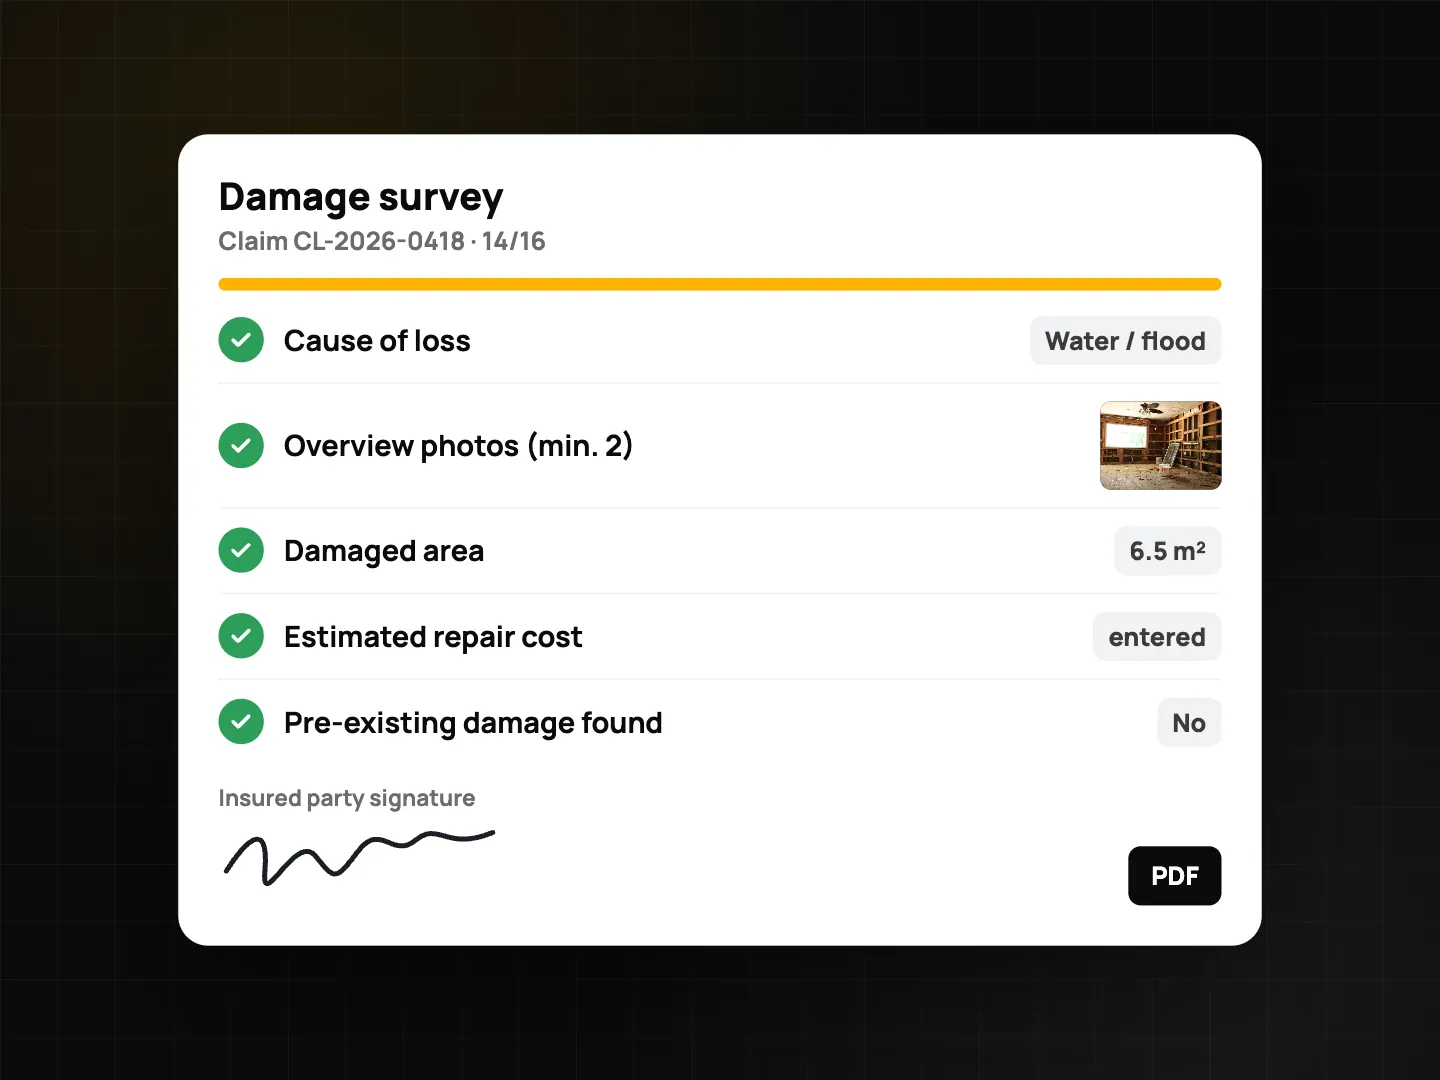
ProofCam's Damage survey template turns that habit into a form. It asks for the claim or policy number, insured party, date of loss, cause, loss location, overview and close-up photos, damaged area in m², serial plates, a description, an estimate, pre-existing damage and a recommendation. When you finish, it produces a photo timeline PDF: the claim photos in the order they were taken, with the time between them, so a reader can follow the visit minute by minute.
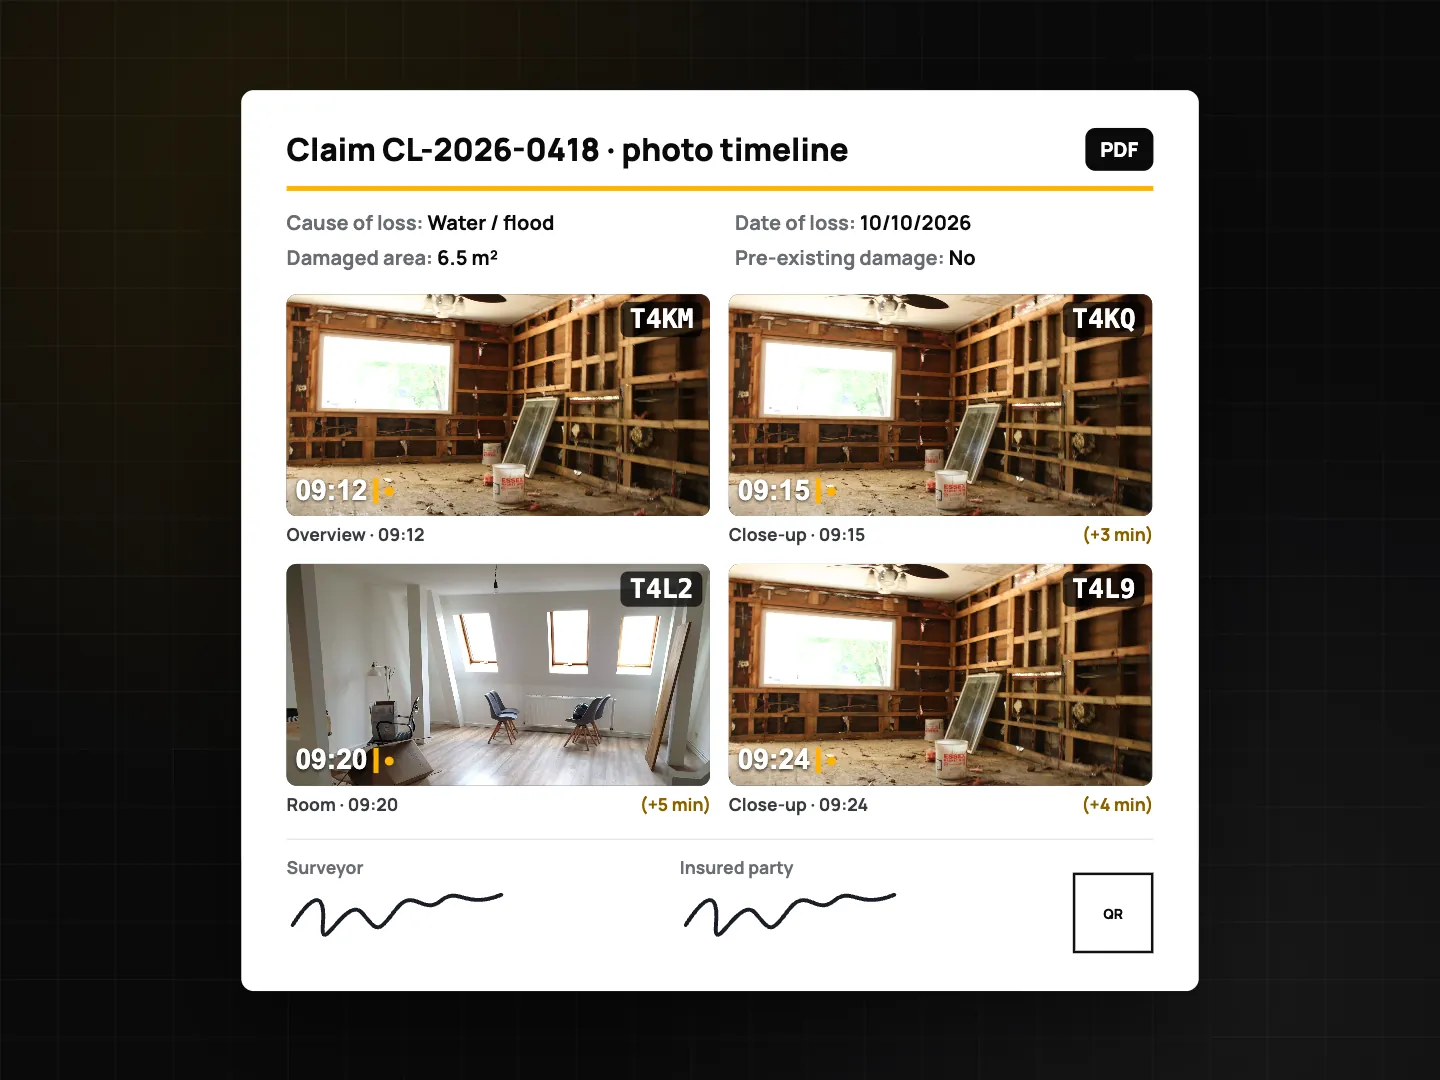
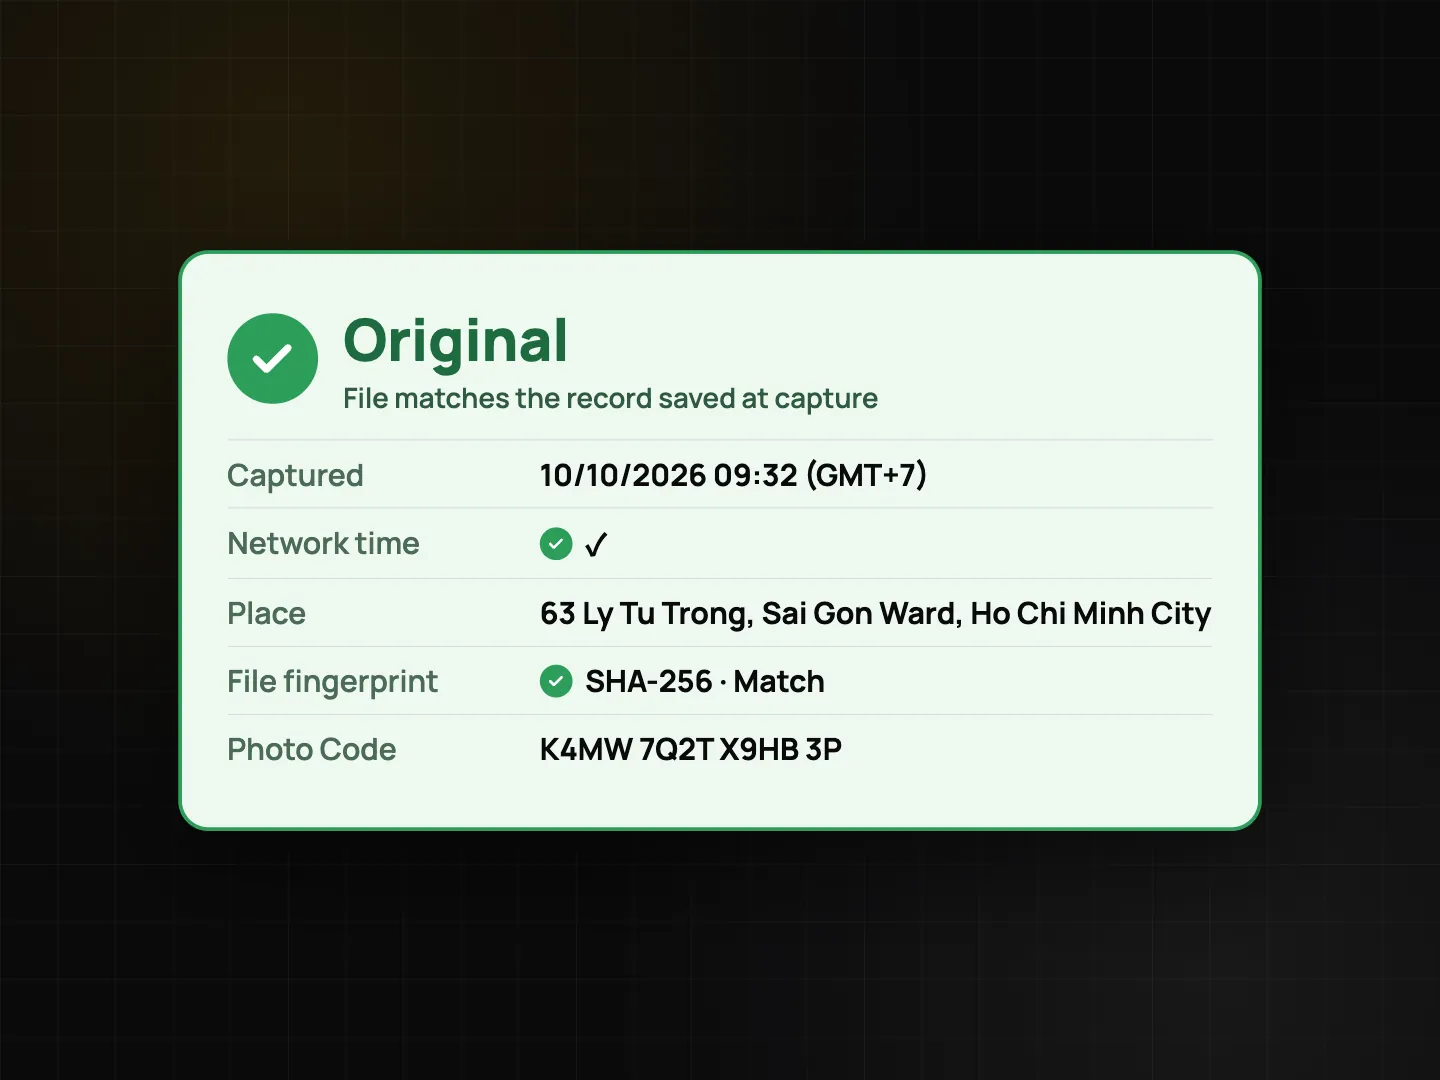
Every photo in that PDF has a Photo Code. The insurer, a reviewer or the policyholder can type it on the verify page and see whether the file is the original, with its capture time and place. The fingerprint is computed in their browser, and the photo itself is not uploaded. Details are in Photo Code: verify original photos.
Step-by-step workflow
- Install the insurance pack. In Checklists, add the Damage survey template. It's part of the insurance pack, unlocked by a personal Plus subscription, a team on the Business trial, or a Business team with the insurance add-on. How question types, signatures and PDFs work is covered in inspection checklists and PDF reports.
- Set up the stamp. Choose the Inspection or Work Record preset and add custom fields such as "Claim no." and "Insured party" (Free allows 3 custom fields, Plus 10). Custom fields can also go into file names, so exports sort by claim.
- Check time and location before the first photo. Open the camera outdoors for a few seconds so network time syncs and GPS settles. If the watermark shows a device-time flag, the time wasn't verified; it's worth noting why. See network time vs. phone clock.
- Shoot wide to close. Street and building, room from the door, damaged area, details. Keep the same order on every claim so files look alike.
- Measure the damage. On a supported phone (ARCore on Android, ARKit/LiDAR on iPhone), use AR measure for the width and height of a stain or crack; area measurement needs Plus. Enter the result in the "Damaged area" question.
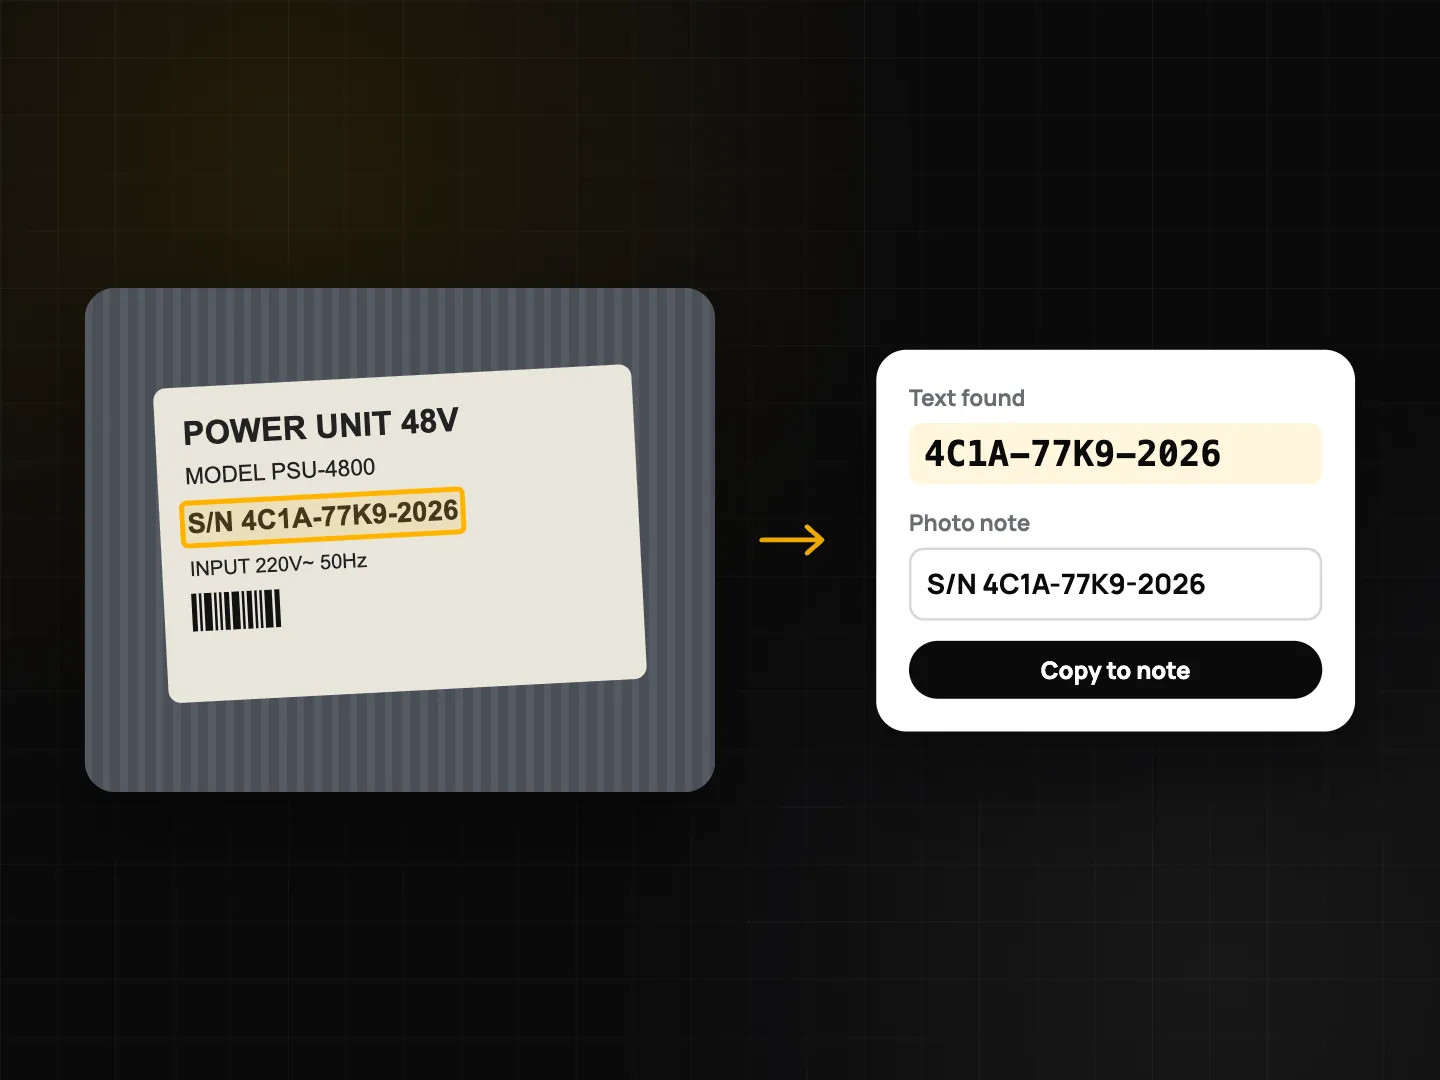
- Capture serial plates. Photograph the boiler, appliance or equipment plate, open the photo details and use text recognition to copy the serial into the note.
- Scan paperwork. Use document mode (Plus) for invoices, receipts and repair quotes. Each page becomes part of a PDF and gets its own Photo Code. More in document scanning and OCR.
- Record pre-existing damage honestly. The template has a dedicated question. Photograph old damage separately and say so in the note; it protects everyone.
- Sign on site. Collect the insured party's signature in the checklist, then generate the timeline PDF.
- Hand over. Send the PDF, or a share link from a Teamspace project (the recipient sees a grid and map and can download a ZIP). When the photos go to someone who doesn't need the home's exact location, use Share without exact location: the copy drops GPS and address, and the Photo Code stays.
Damage survey checklist
The bundled template covers most claims. If you build your own on Plus or Business, here is a practical structure mapped to Checklist 2.0 question types:
| Item | Question type | Notes |
|---|---|---|
| Claim / policy number | Text | Or scan a barcode on the claim letter |
| Date of loss | Date | |
| Cause of loss | Single choice | Water/flood, fire/smoke, storm, theft, impact, other |
| Loss location | GPS location | Plus the address on every photo |
| Overview photos | Photo (min 2) | Building and room, wide |
| Close-up photos | Photo (min 3) | Damage, with AR measure where possible |
| Damaged area | Number with unit (m²) | |
| Serial plates | Photo + text | Serial copied by text recognition |
| Pre-existing damage | Yes/No, conditional photo + note on "Yes" | |
| Description | Text | |
| Estimated repair cost | Number | Your estimate, not a settlement |
| Recommendation | Single choice | Repair, replace, further inspection |
| Insured party signature | Signature | |
| Surveyor signature | Signature |
For policyholders documenting their own loss before an adjuster visits, a shorter list works: overview of each room, every damaged item close up, serial plates, receipts scanned, and a note of what happened and when.
Tips for adjusters and policyholders
- Keep the original files. Chat apps recompress photos, so a forwarded copy shows as a "Modified copy" on the verify page. The code still points to the original record, but send originals as files when an exact match matters.
- Use Live proof for high-value items (Plus or Business). A 1.5-second clip before and after the shutter is stored inside the photo, which makes a staged or re-shot picture harder to pass off. Read screen recapture detection and Live proof.
- Take the recapture warning seriously. If you photograph a meter display or a screen on purpose, switch on Device screen mode so the photo records that it was intentional.
- Sign your files. With C2PA Content Credentials (Plus or Business), checkers show the signature as valid but not from a trusted signer, because the certificate is created on the device. See privacy, app lock and C2PA.
- No signal in the basement? Keep shooting. Photos and codes work offline and register when the phone is back online.
FAQ
Will my insurer accept ProofCam photos?
We can't promise that; each insurer and market has its own rules. ProofCam helps provide evidence of when and where a photo was taken and whether the file is the original, so check your insurer's or regulator's documentation requirements.
Does the Damage survey template need a paid plan?
Yes. It is part of the insurance pack, unlocked by personal Plus, a team on the Business trial, or a Business team with the insurance add-on. Stamped photos, Photo Codes and verification are free.
Can the insurer check a photo without an account?
Yes. Anyone can enter the Photo Code on the verify page. The fingerprint is computed in their browser and the photo is not uploaded.
Does AR measure work on every phone?
No. It needs a supported phone (ARCore on Android, ARKit on iPhone, LiDAR improves accuracy). Distance and height are free; path and area need Plus.
Related: move-in move-out inspection app and proof of work photos for contractors.